
13. RSVP Form & Submissions
Go to Content Manager → Lead. The Lead collection stores RSVP submissions received through the website registration form.
Lead entries are created automatically from frontend RSVP submissions. They are intended primarily for reviewing and exporting registration data, rather than for manual entry in the CMS.
13.1 What the RSVP Form Captures
The RSVP form stores the information submitted by each registrant together with consent and event-related metadata.
- First Name - as entered by the registrant.
- Last Name - as entered by the registrant.
- Email - the registrant's email address.
- Mobile - the registrant's mobile number.
- Company / School - where the registrant works or studies.
- Occupation - stored using the form option's underlying value.
- Interested In - the programme categories selected by the registrant, stored as a comma-separated list.
- Consent Given - records whether the consent checkbox was selected. A submission without consent is refused, so stored RSVP records should show consent as given.
- Consent Given At - the date and time of consent, stamped by the server when the form is submitted.
- Consent Wording - stores the exact consent statement shown to the registrant at the time of submission.
- Event - links the submission to the annual Event that was marked as Main when the registration was received.
- Retain Until - records the retention date associated with the submission.
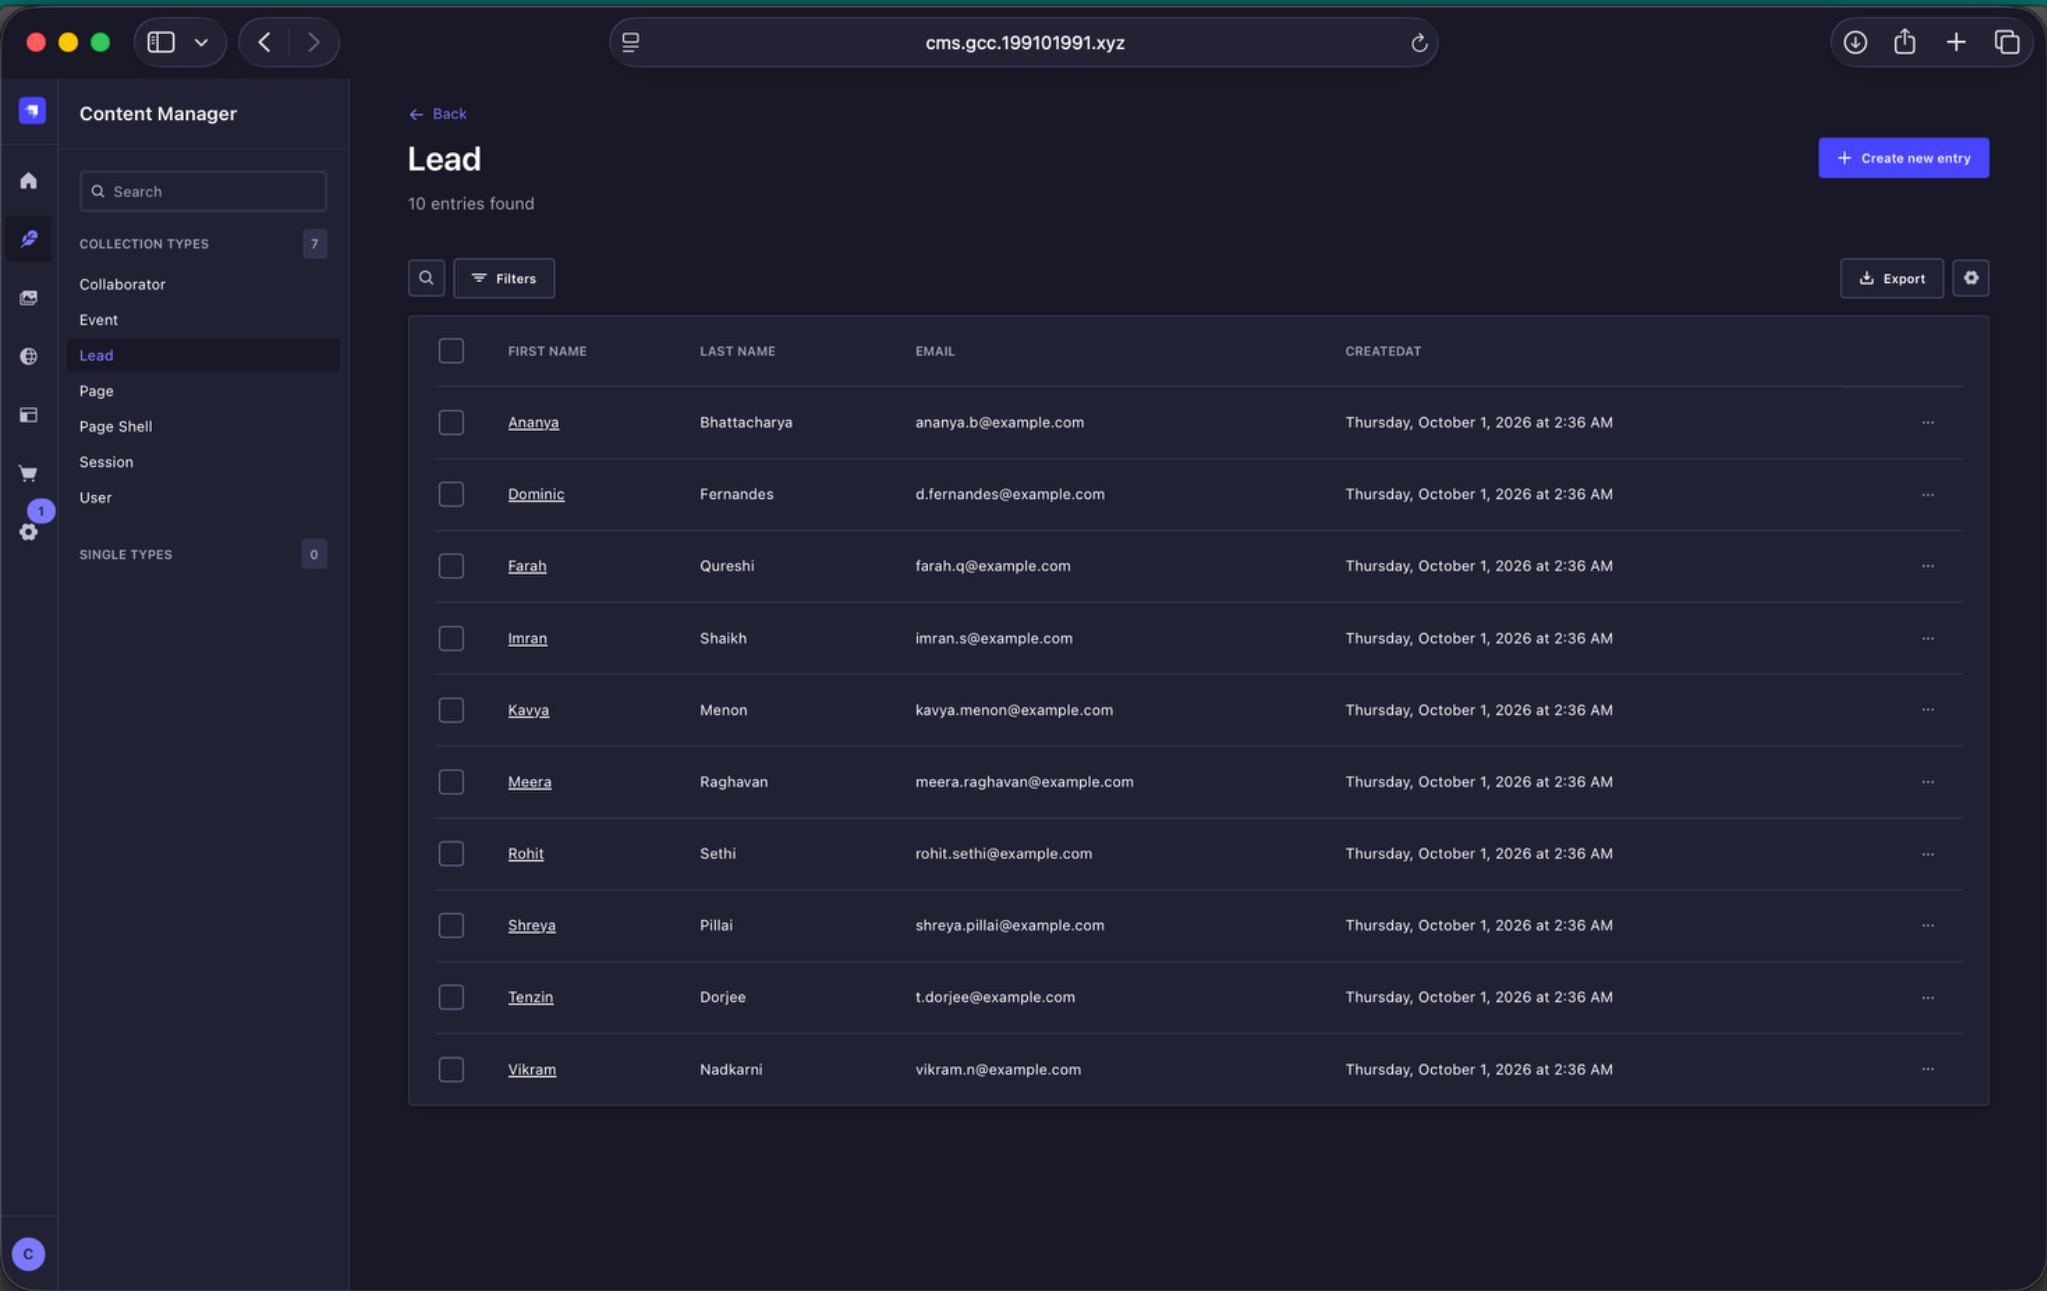
RSVP submissions. The Lead collection lists registrations received through the website, including the registrant's name, email address and submission date.
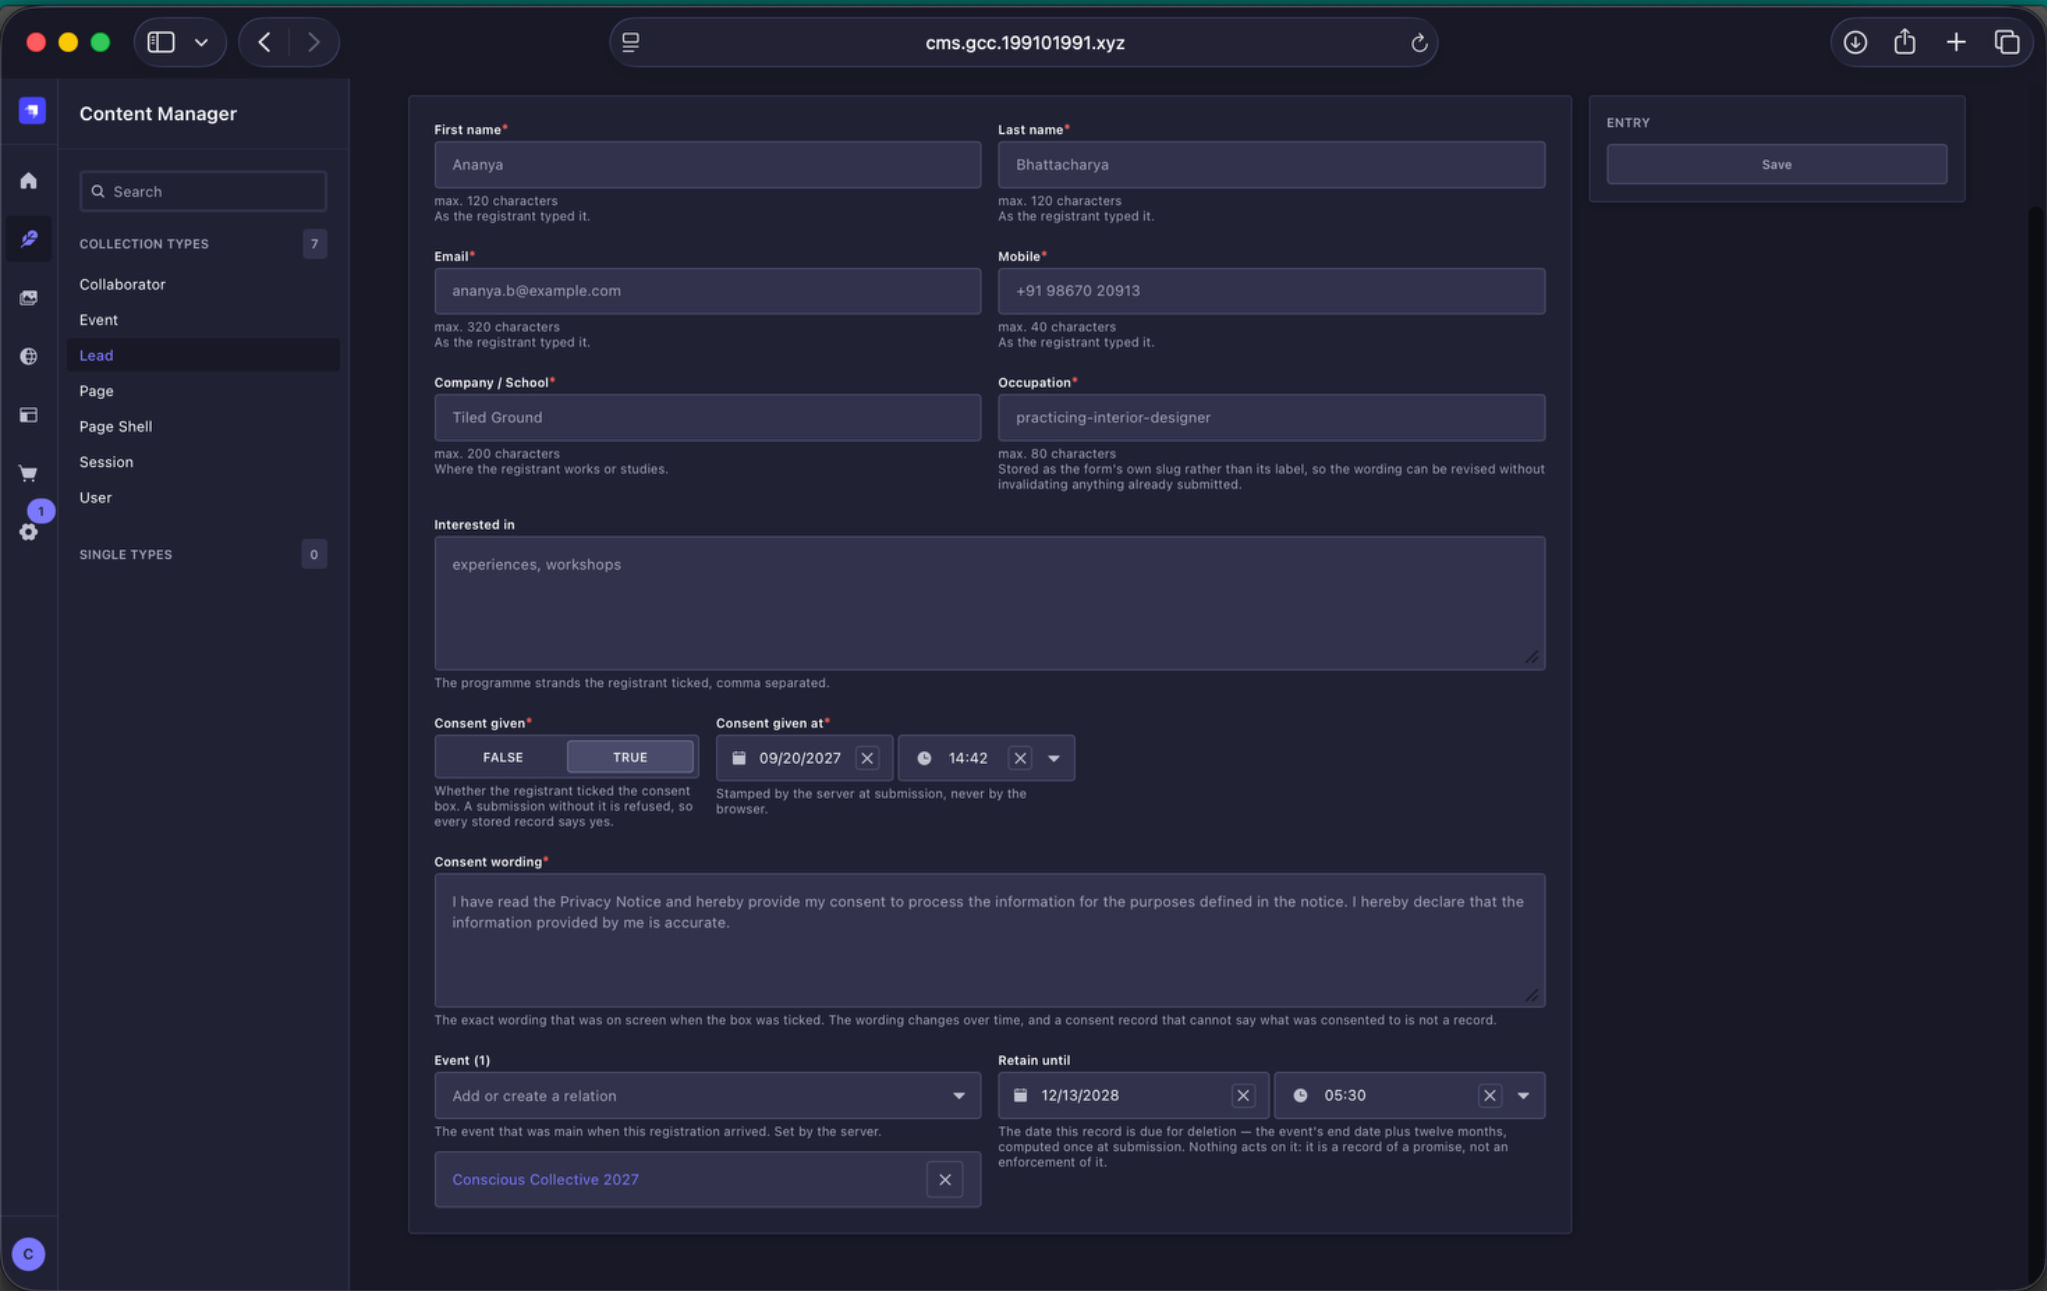
RSVP submission detail. Opening a Lead entry shows the registrant's submitted information together with their interests, consent record, associated Event and retention date.
13.2 Downloading the CSV
RSVP submissions can be downloaded from the Lead collection using the Export button in the top-right corner of the listing.
The export panel allows you to:
- export using a Preset or choose a Custom date range,
- choose the number or range of entries to export - the current preset shown is Latest 50,
- select which fields should be included in the export, and
- download the selected registration data as a CSV file.
The available export fields include First Name, Last Name, Email, Mobile, Company / School, Occupation, Interested In, Consent Given, Consent Given At, Consent Wording, Event and Retain Until.
Dates in the export tool are read in the Asia/Kolkata timezone.
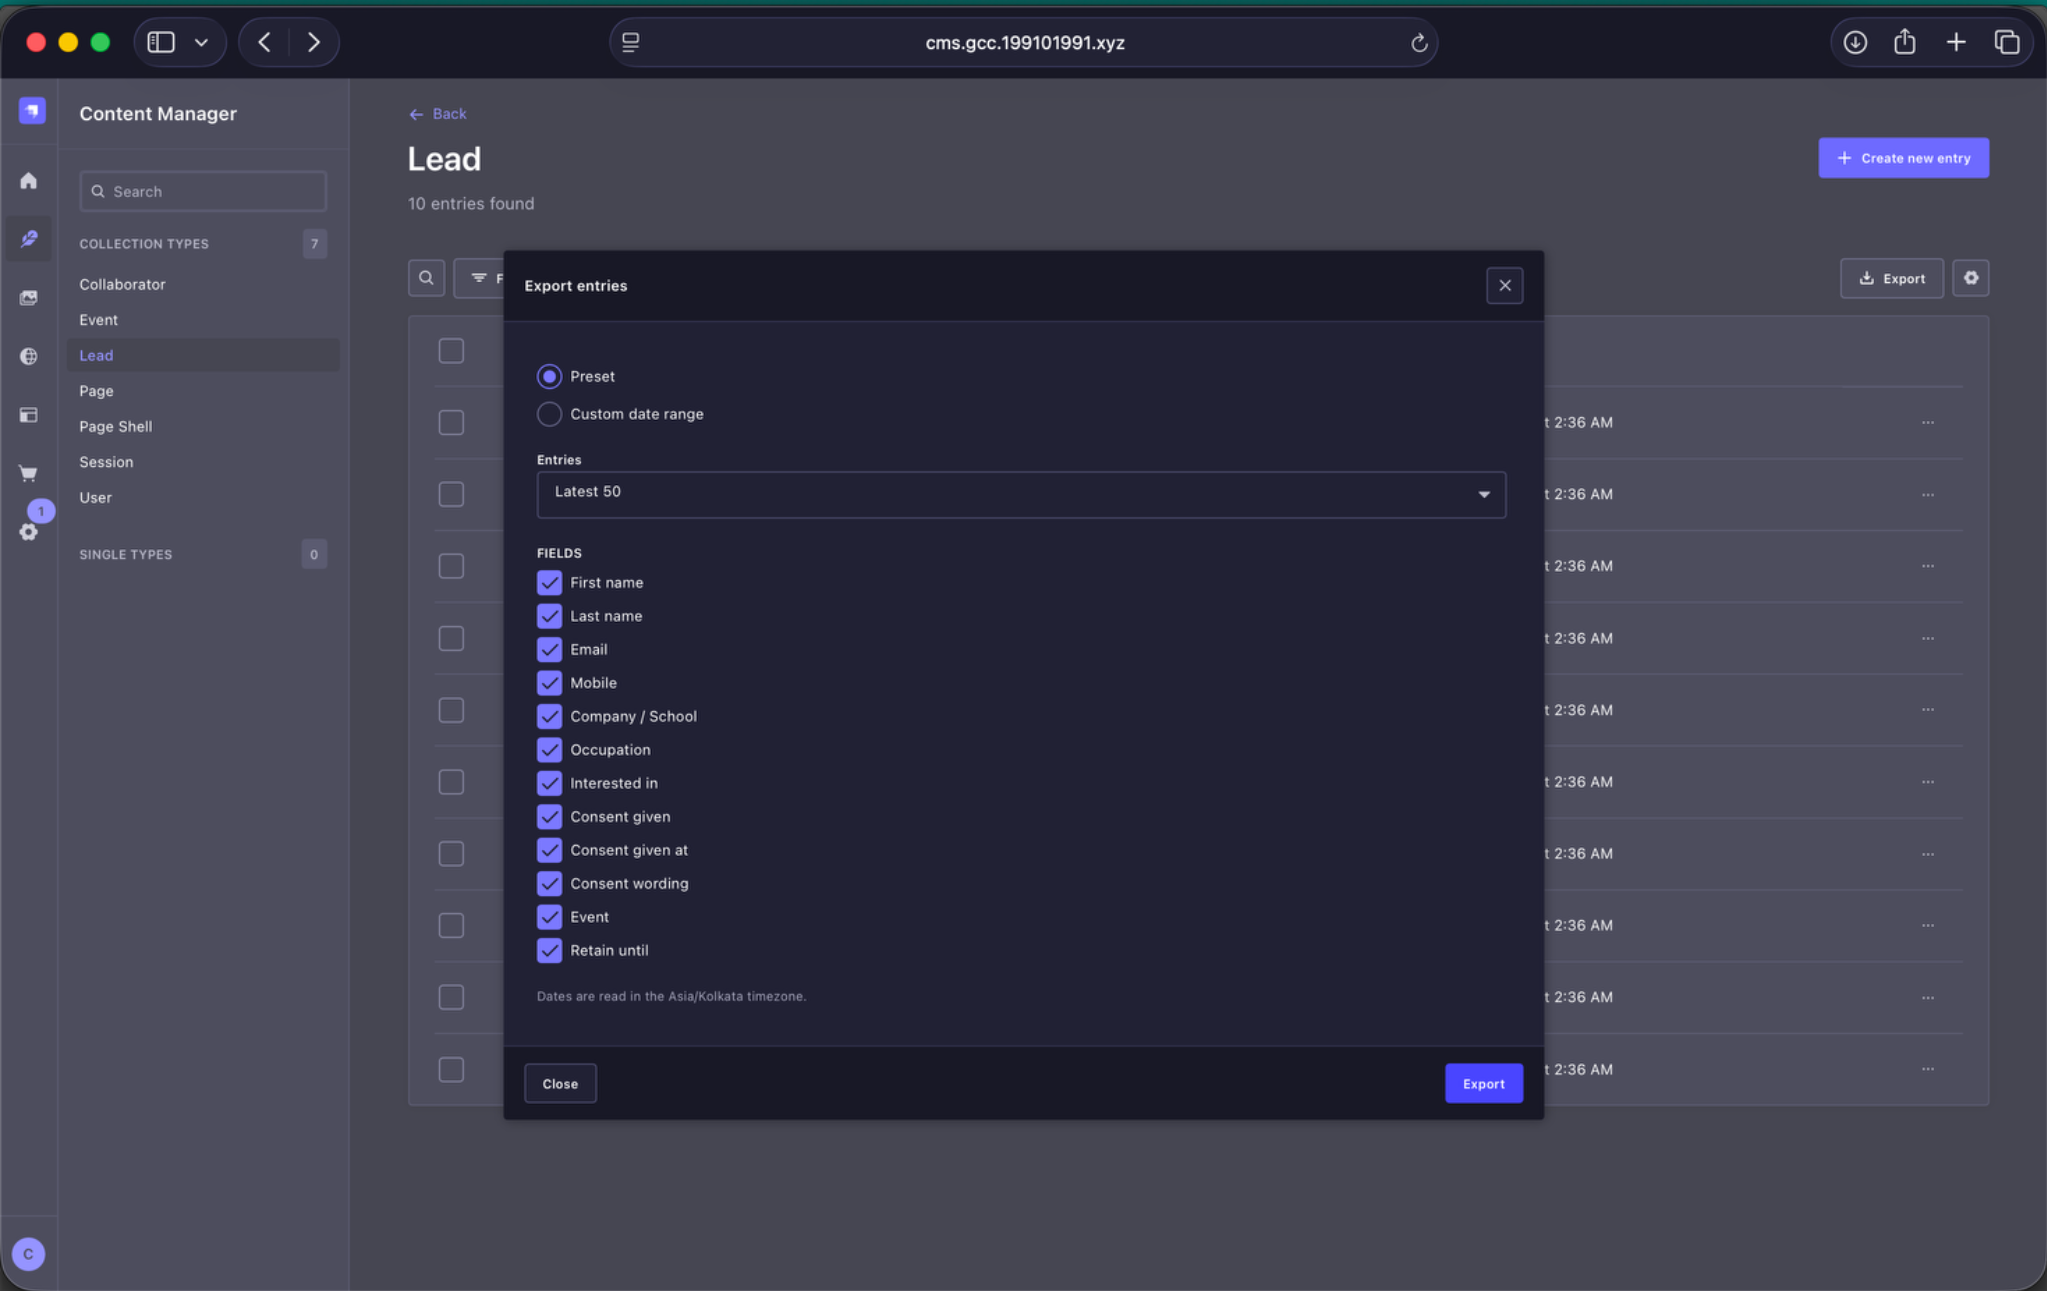
CSV export options. Use Export to choose a preset or custom date range, select the fields required, and download the RSVP submission data.
13.3 RSVP Form Image Slideshow
The image slideshow that appears alongside the RSVP form is managed through Page Shell, not from the RSVP submissions area.
| Image field | Upload dimensions | Aspect ratio | Guidance |
|---|---|---|---|
| RSVP slideshow image | 1088 × 1450 px each | Approximately 3:4 | Use the same dimensions across all slideshow images. Keep important subjects away from the outer edges and keep captions short and legible. |
To update the slideshow:
- Go to Content Manager → Page Shell.
- Open the Primary Page Shell.
- Scroll down to Registration form slideshow.
- Add or replace the images used in the slideshow.
- Add a Caption for each image where required. This caption is the text shown with the image on the RSVP form.
- Save the Page Shell entry once the slideshow has been updated.
The RSVP slideshow is a shared Page Shell setting. Update it here rather than trying to edit it from the RSVP form or Lead entries.
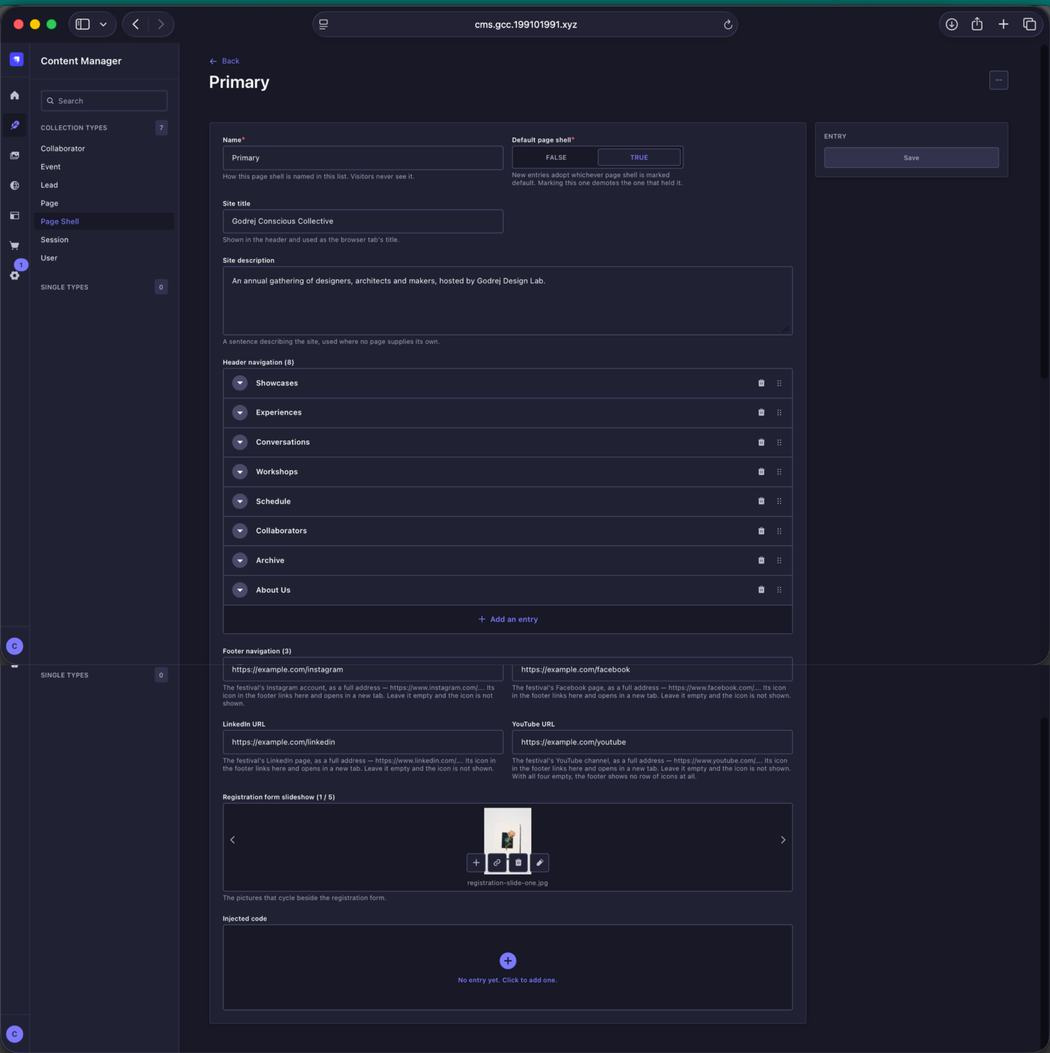
RSVP form slideshow location. Go to Page Shell → Primary and scroll to Registration form slideshow to add, replace or reorder the images used beside the RSVP form.
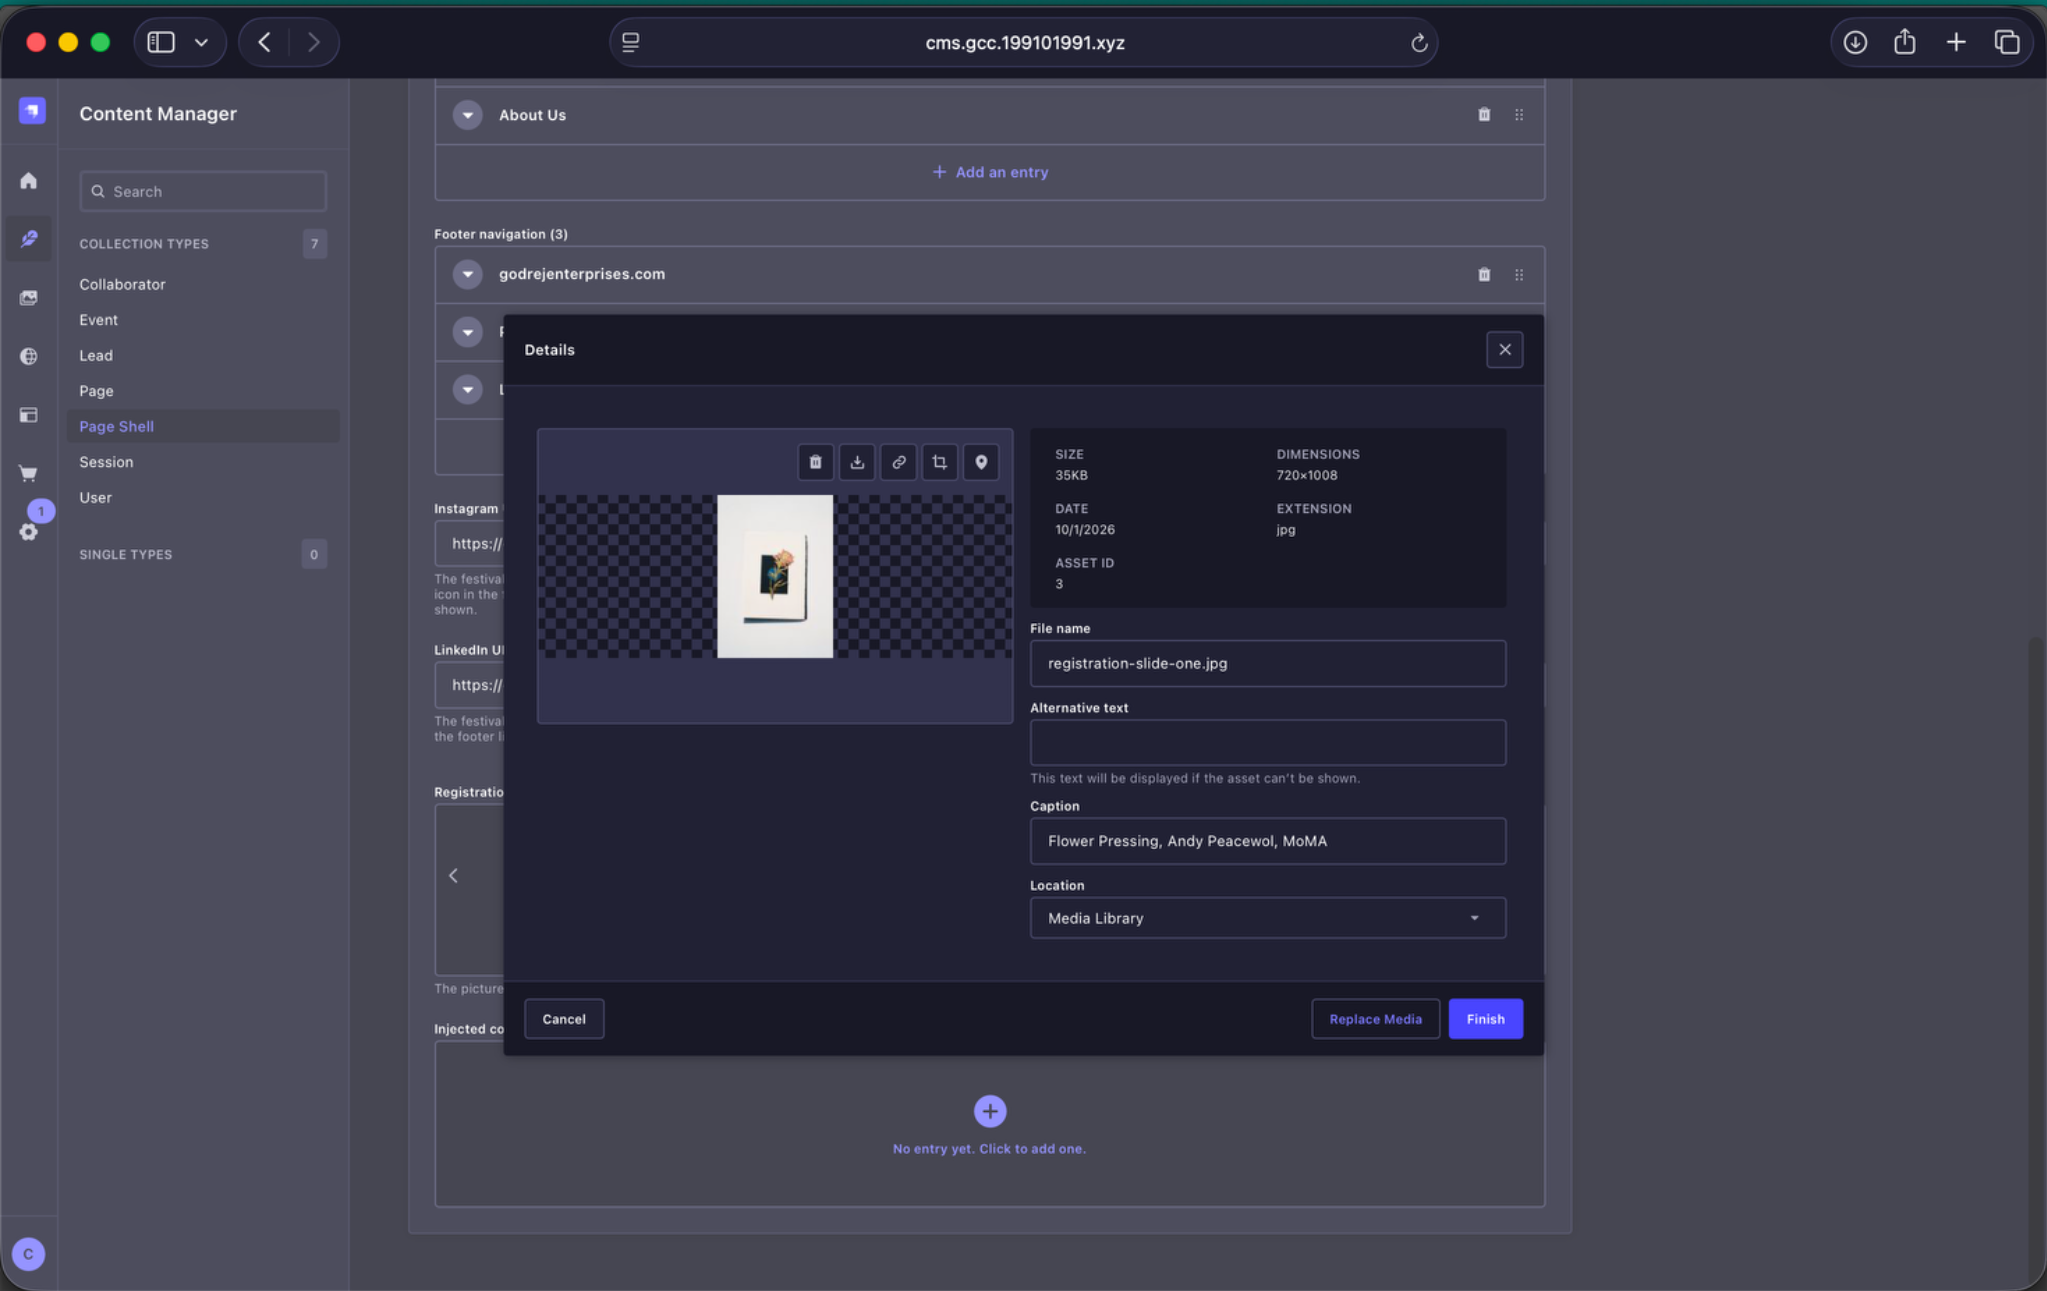
RSVP slideshow image details. Open the image details and add the image Caption where required. This is the caption that appears with the slideshow image.