
10. Session Page
The Session Page is the shared detail-page template used for Showcases, Experiences, Conversations and Workshops. The Session's selected category determines which category listing it appears under and which category colour system it inherits.
Go to Content Manager → Session and either open an existing Session or create a new one.
10.1 Session Basics
Start by entering the core information for the Session:
- Name - the Session title. The page heading and URL are derived from this field.
- Category - choose Showcase, Experience, Conversation or Workshop. This controls the Session's category listing and colour treatment.
- Standfirst - the short introductory description shown beneath the Session title.
- Event - connect the Session to the correct annual Event.
- Page Shell - use the Primary Page Shell.
Session Cover Image
Upload one main image for the Session. The same image is reused across the Session listing cards, Schedule Page and Session Detail Page banner.
| Image field | Upload dimensions | Aspect ratio | Guidance |
|---|---|---|---|
| Medium screens / desktop | 2048 × 1536 px | 4:3 | Upload under Medium Screens. Prepare this crop intentionally because the Session image is reused across listing cards, the Schedule Page and the Session Page. |
| Small screens / mobile | 1080 × 1080 px | 1:1 | Upload under Small Screens. Keep important subjects away from the edges so the square crop remains clear. |
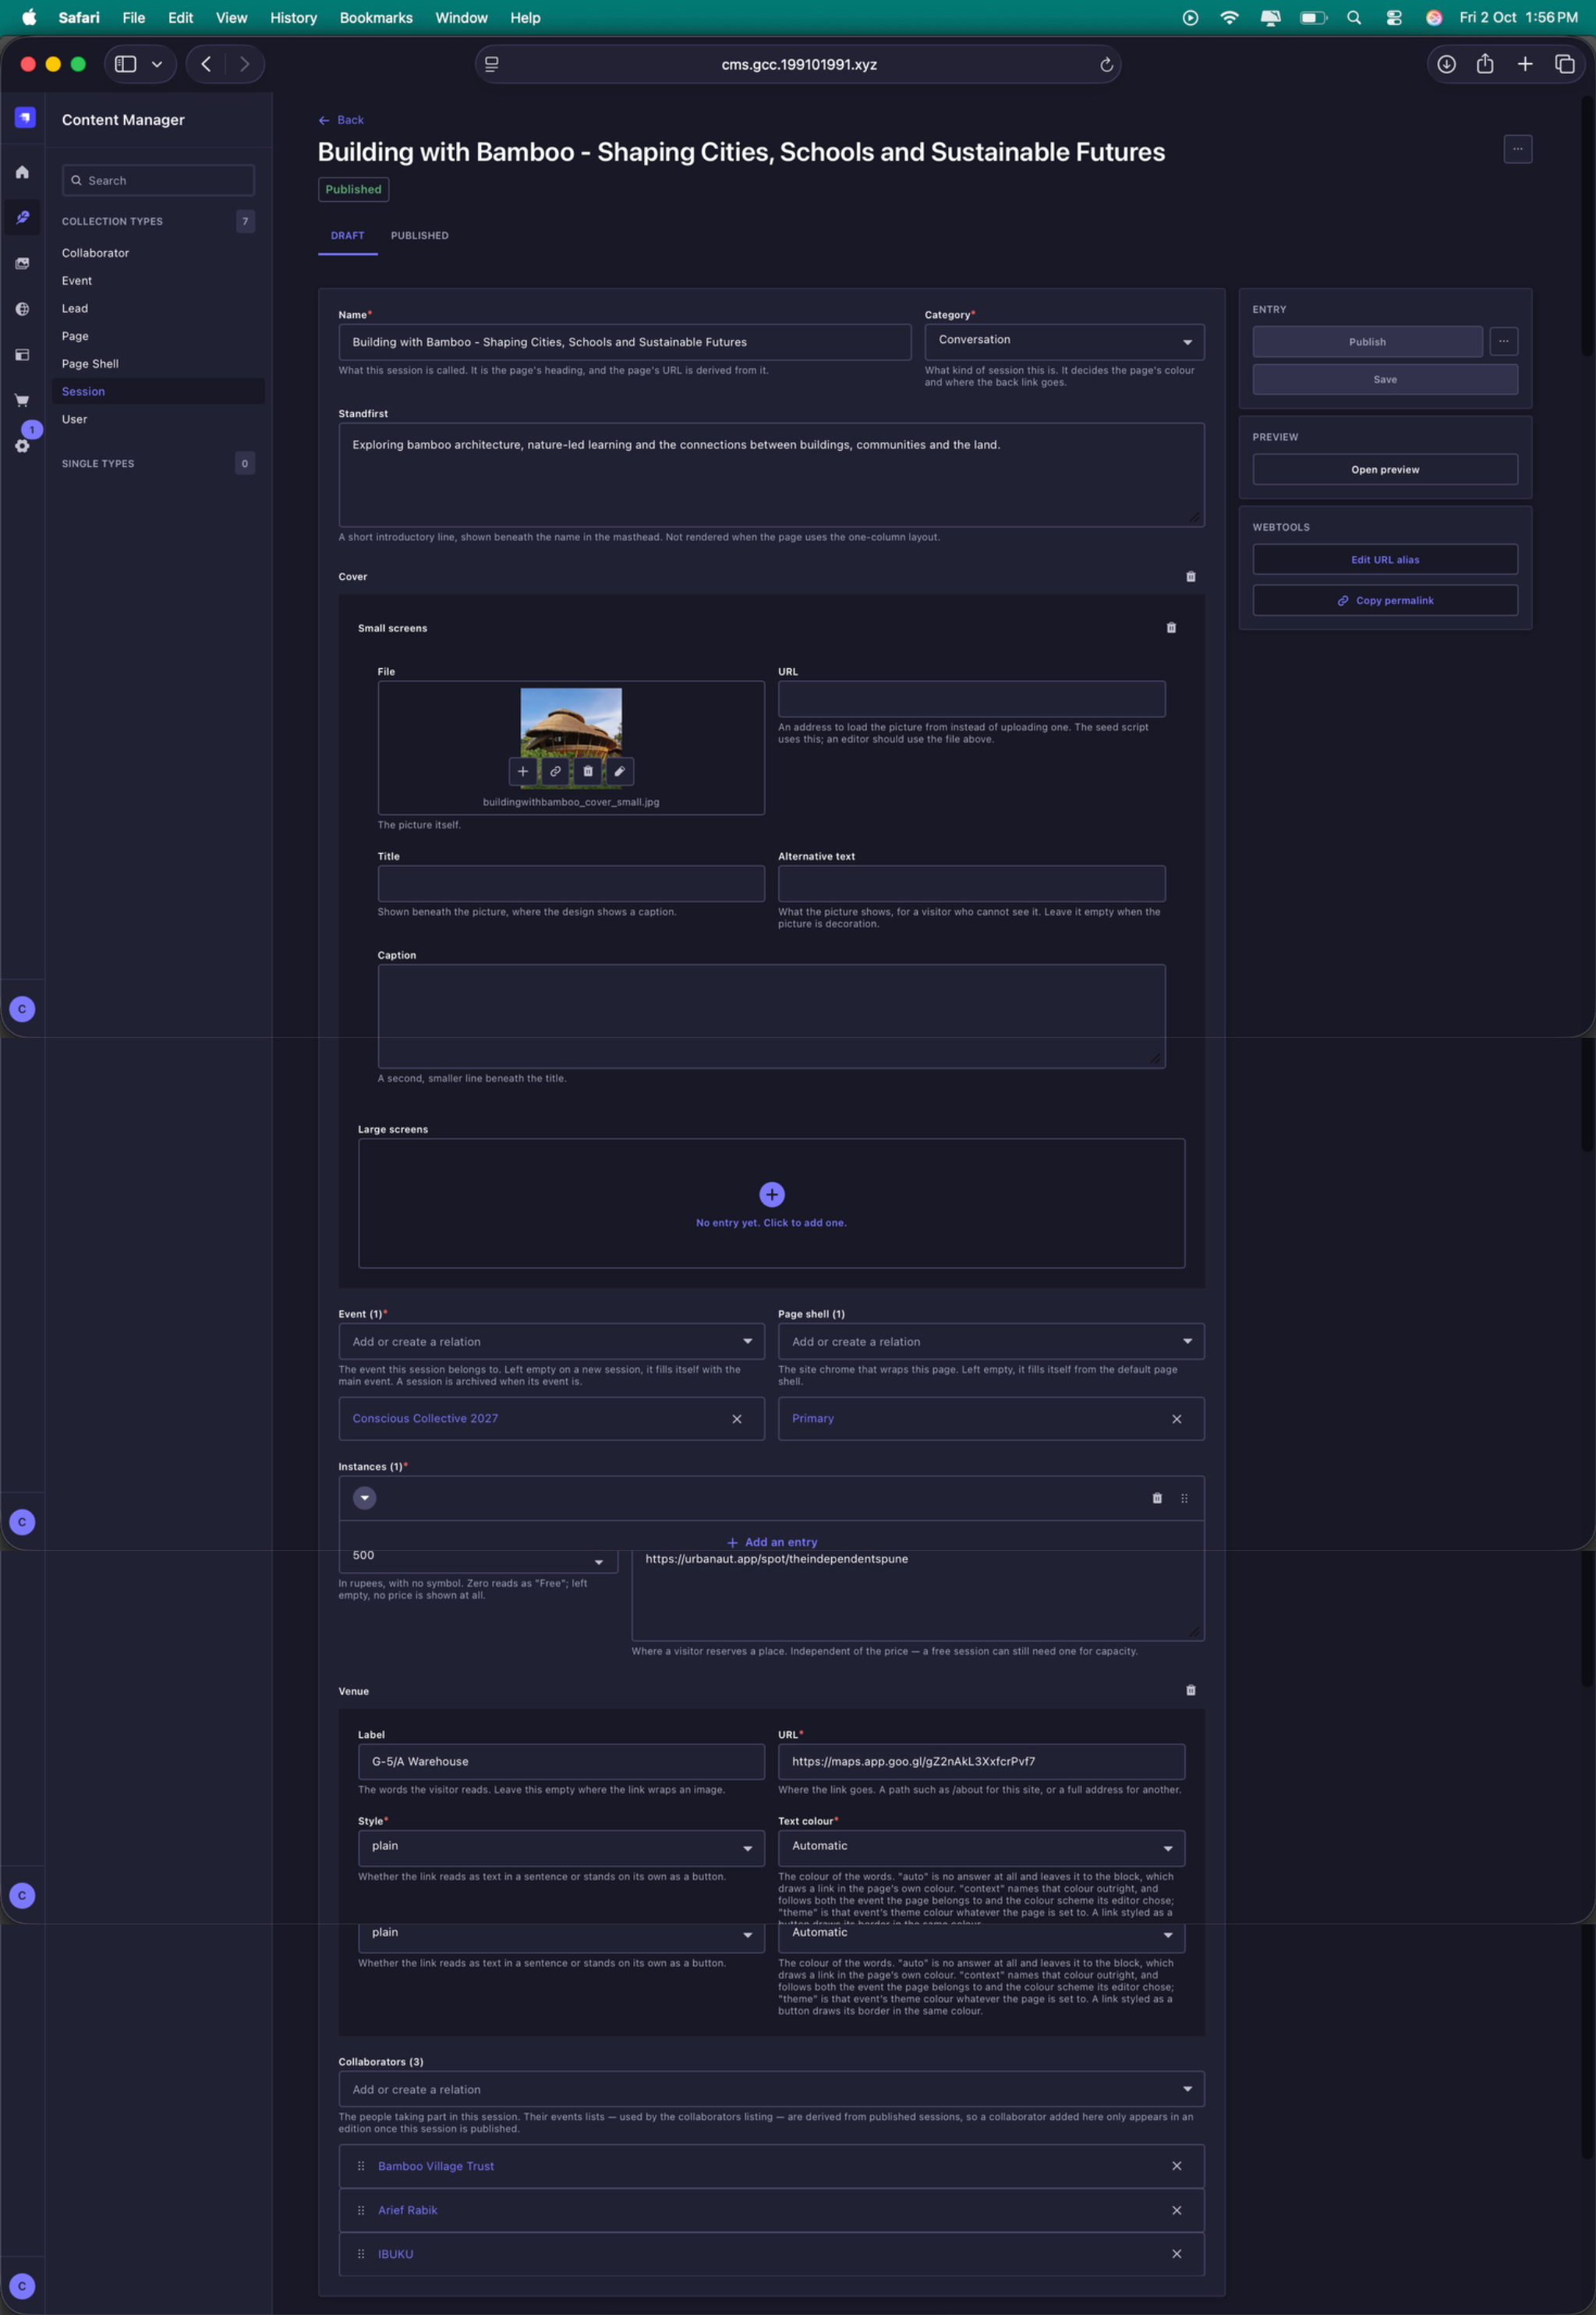
Session setup. The Session entry begins with the title, category, standfirst and cover image, followed by the annual Event relation, schedule instances and practical Session information.
10.2 Dates, Times & Repeat Sessions
Use Instances to define when the Session takes place. Each instance contains a start date and time and an end date and time.
A Session can have more than one instance. This is how repeat Sessions are handled. Add another instance for each additional occurrence rather than creating a duplicate Session page.
A Session with instances on multiple event days will automatically appear under each relevant day in the listing-page and schedule filters.
- Starts / Ends - set the date and time for each occurrence.
- All Day - use this when the Session should display as an all-day Session instead of showing its times.
- Age Group - set the intended audience so the listing-page Age Group filter works correctly. This can be all-inclusive, specifically intended for children, or age-restricted where required.
10.3 Ticketing & Venue
- Price - enter the value in rupees without a currency symbol. A value of 0 is displayed as Free. If left empty, no price is shown.
- Booking Link - add the booking or reservation URL where required. A free Session can still have a booking link if capacity needs to be managed.
- Venue - enter the venue label and the corresponding location URL.
These fields also feed the Session listings and Schedule Page, so keep them accurate and consistent.
10.4 Assigning Collaborators
Use the Collaborators relation to connect the people or organisations participating in the Session. Select the relevant collaborator entries and arrange them in the order they should appear.
Collaborators should be created once under the Collaborator collection and then referenced here, rather than re-entering their profile information inside the Session.
10.5 Main Content
The Main Region contains the editorial content of the Session Page. The current design provides one example of how a Session can be structured, but editors are not locked to that exact sequence.
Use the approved design as a reference when it suits the content. If a Session needs a different treatment, the available content blocks can be combined in different ways to suit the material.
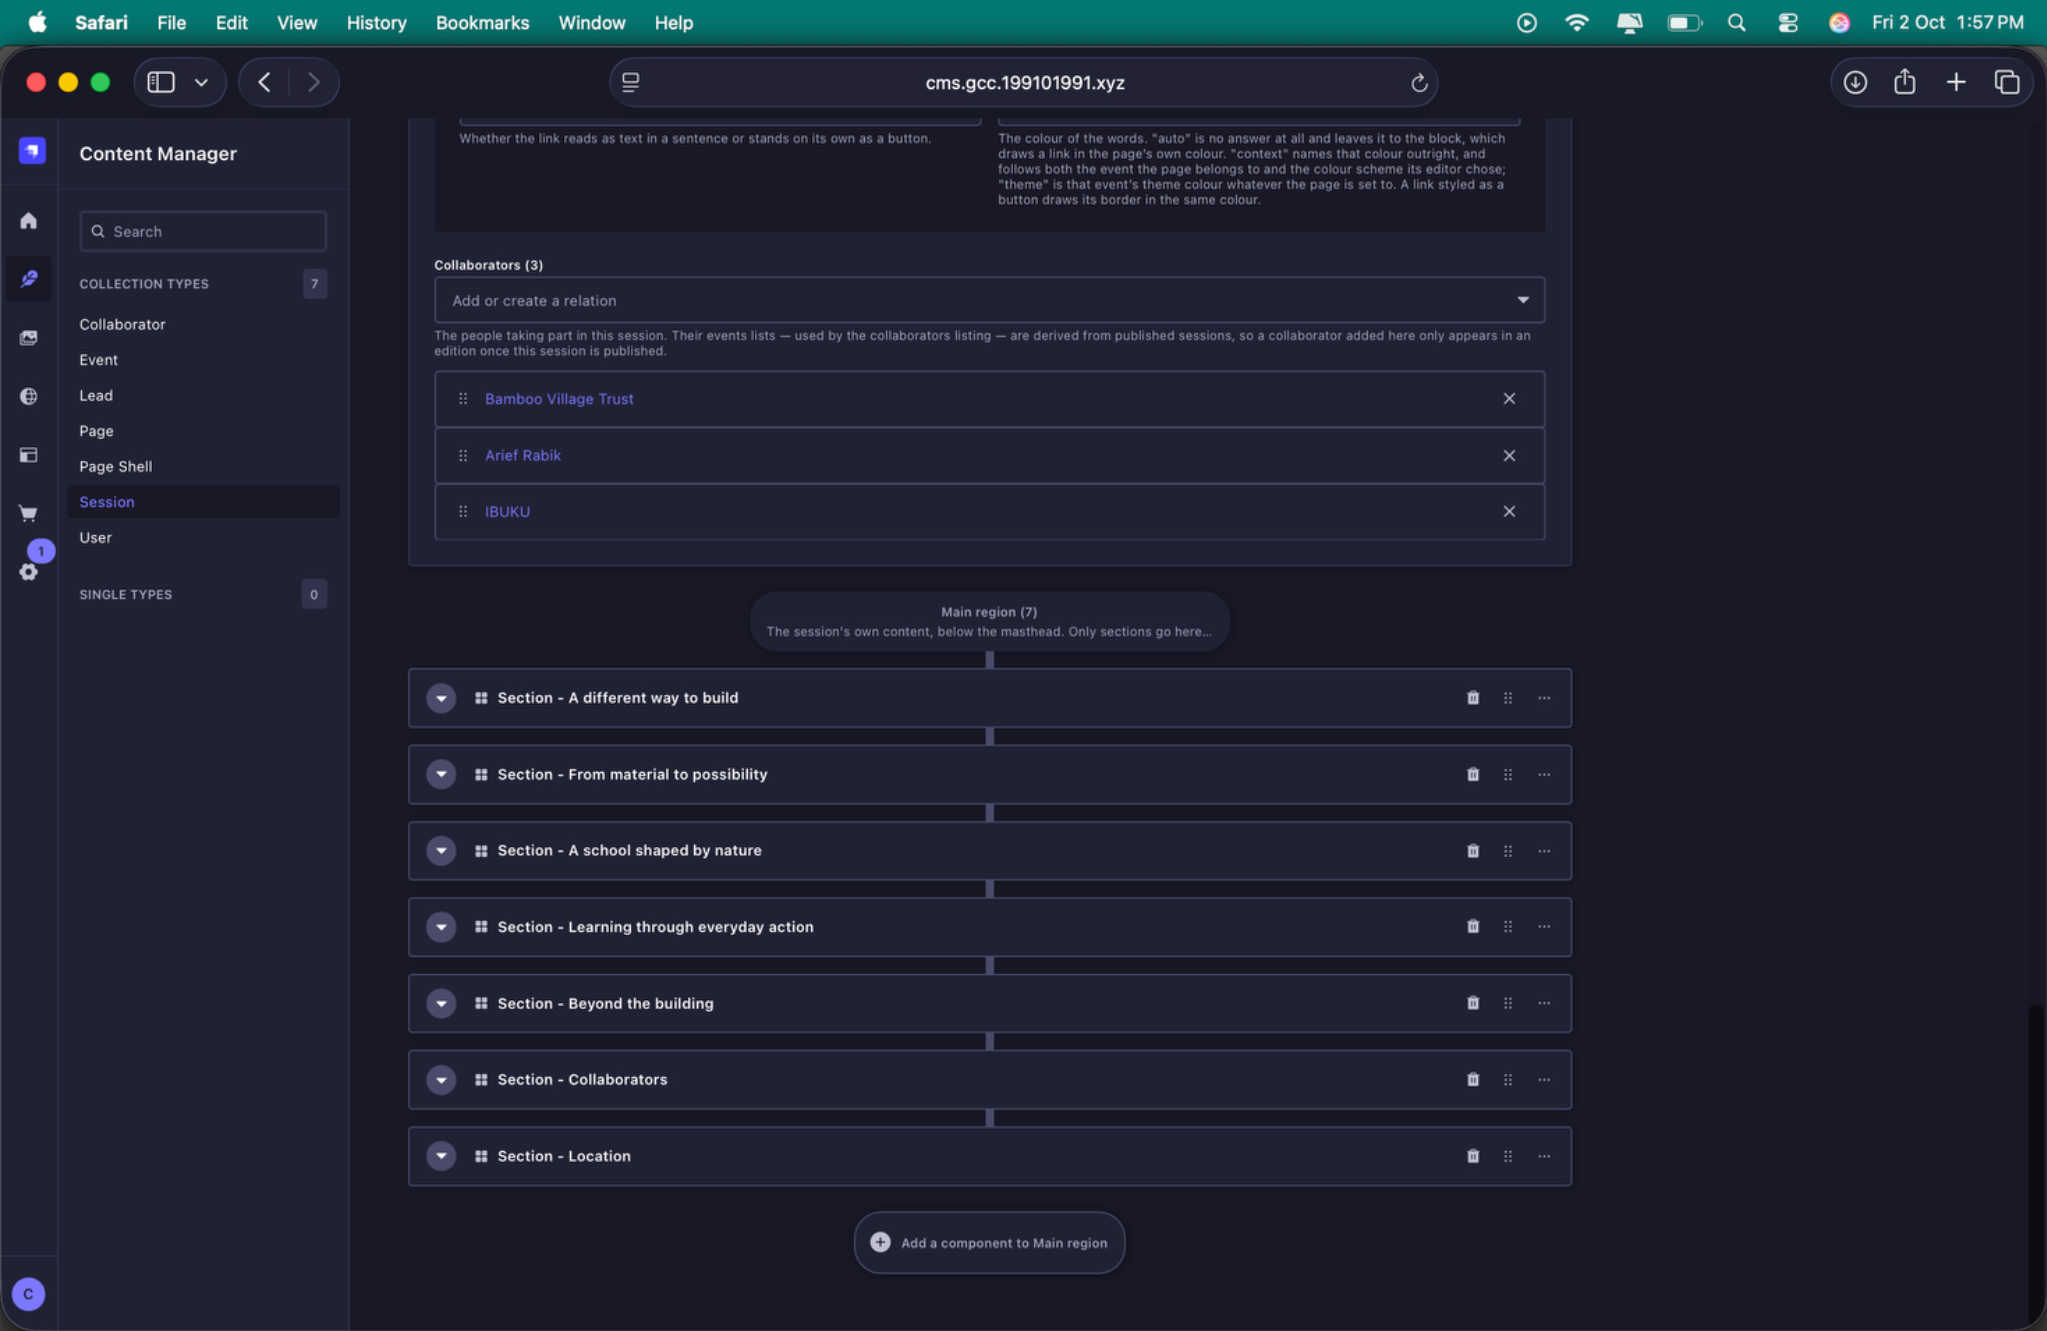
Session Main Region. The sample Session contains a sequence of editorial sections followed by Collaborators and Location. The exact editorial section titles can change from Session to Session.
For a normal editorial Section:
- Title - the CMS label for the Section.
- Heading - the visible heading on the website.
- Opening Line - optional supporting copy where required.
- Content blocks - add the appropriate blocks for the material available, such as WYSIWYG text, images, image-and-content combinations or other supported content blocks.
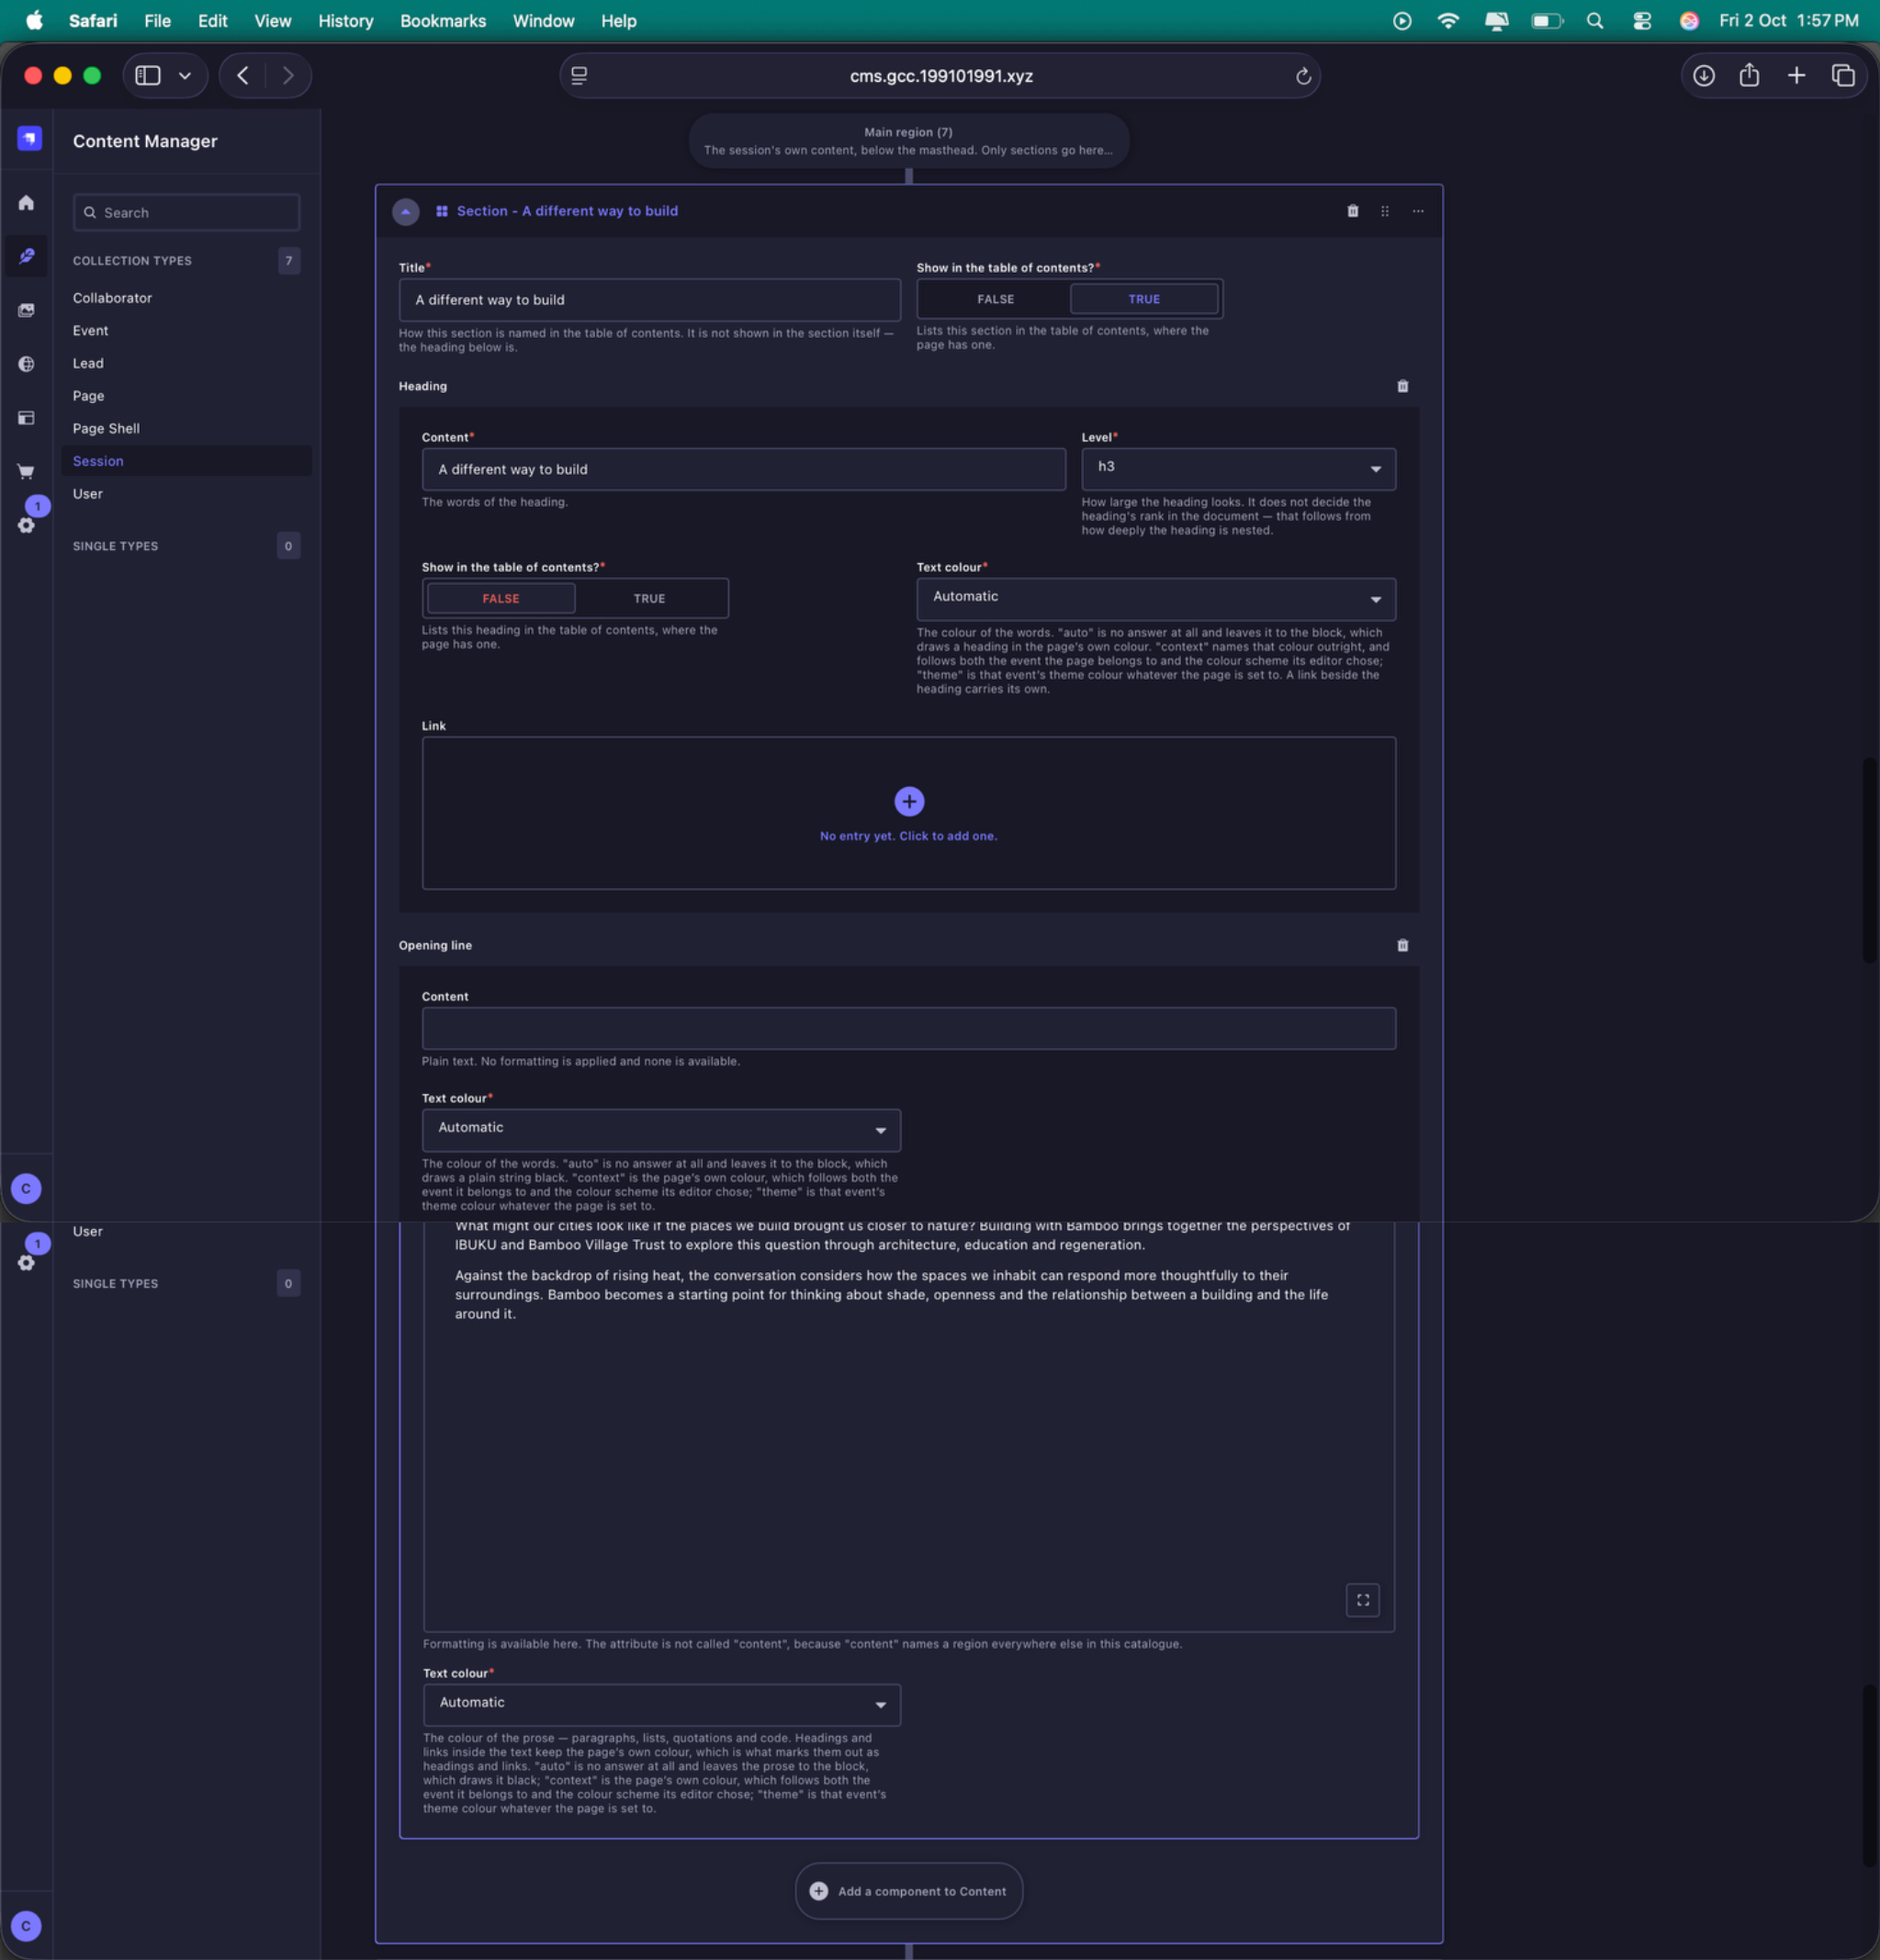
Example editorial section. This sample uses an H3 heading and a WYSIWYG content block. The WYSIWYG editor supports formatted body copy such as paragraphs, lists, links and emphasis.
Refer to 04. List of Content Blocks for the available building blocks, and to the dedicated Image Guidelines for image specifications.
10.6 Collaborators Section
The Session Page can include a Collaborators section within the Main Region. This displays the people or organisations associated with the Session.
There is no fixed upper limit to how many collaborators can be linked. Add every collaborator associated with that Session, provided their Collaborator entry has already been created in the CMS.
- Layout - use the layout appropriate to the design.
- Collaborators - select the existing Collaborator entries associated with the Session.
- Order - drag the linked collaborators into the order they should appear.
Do not re-enter collaborator names, roles or biographies inside the Session. Create and maintain that information once in the Collaborator collection, then link the correct collaborator here.
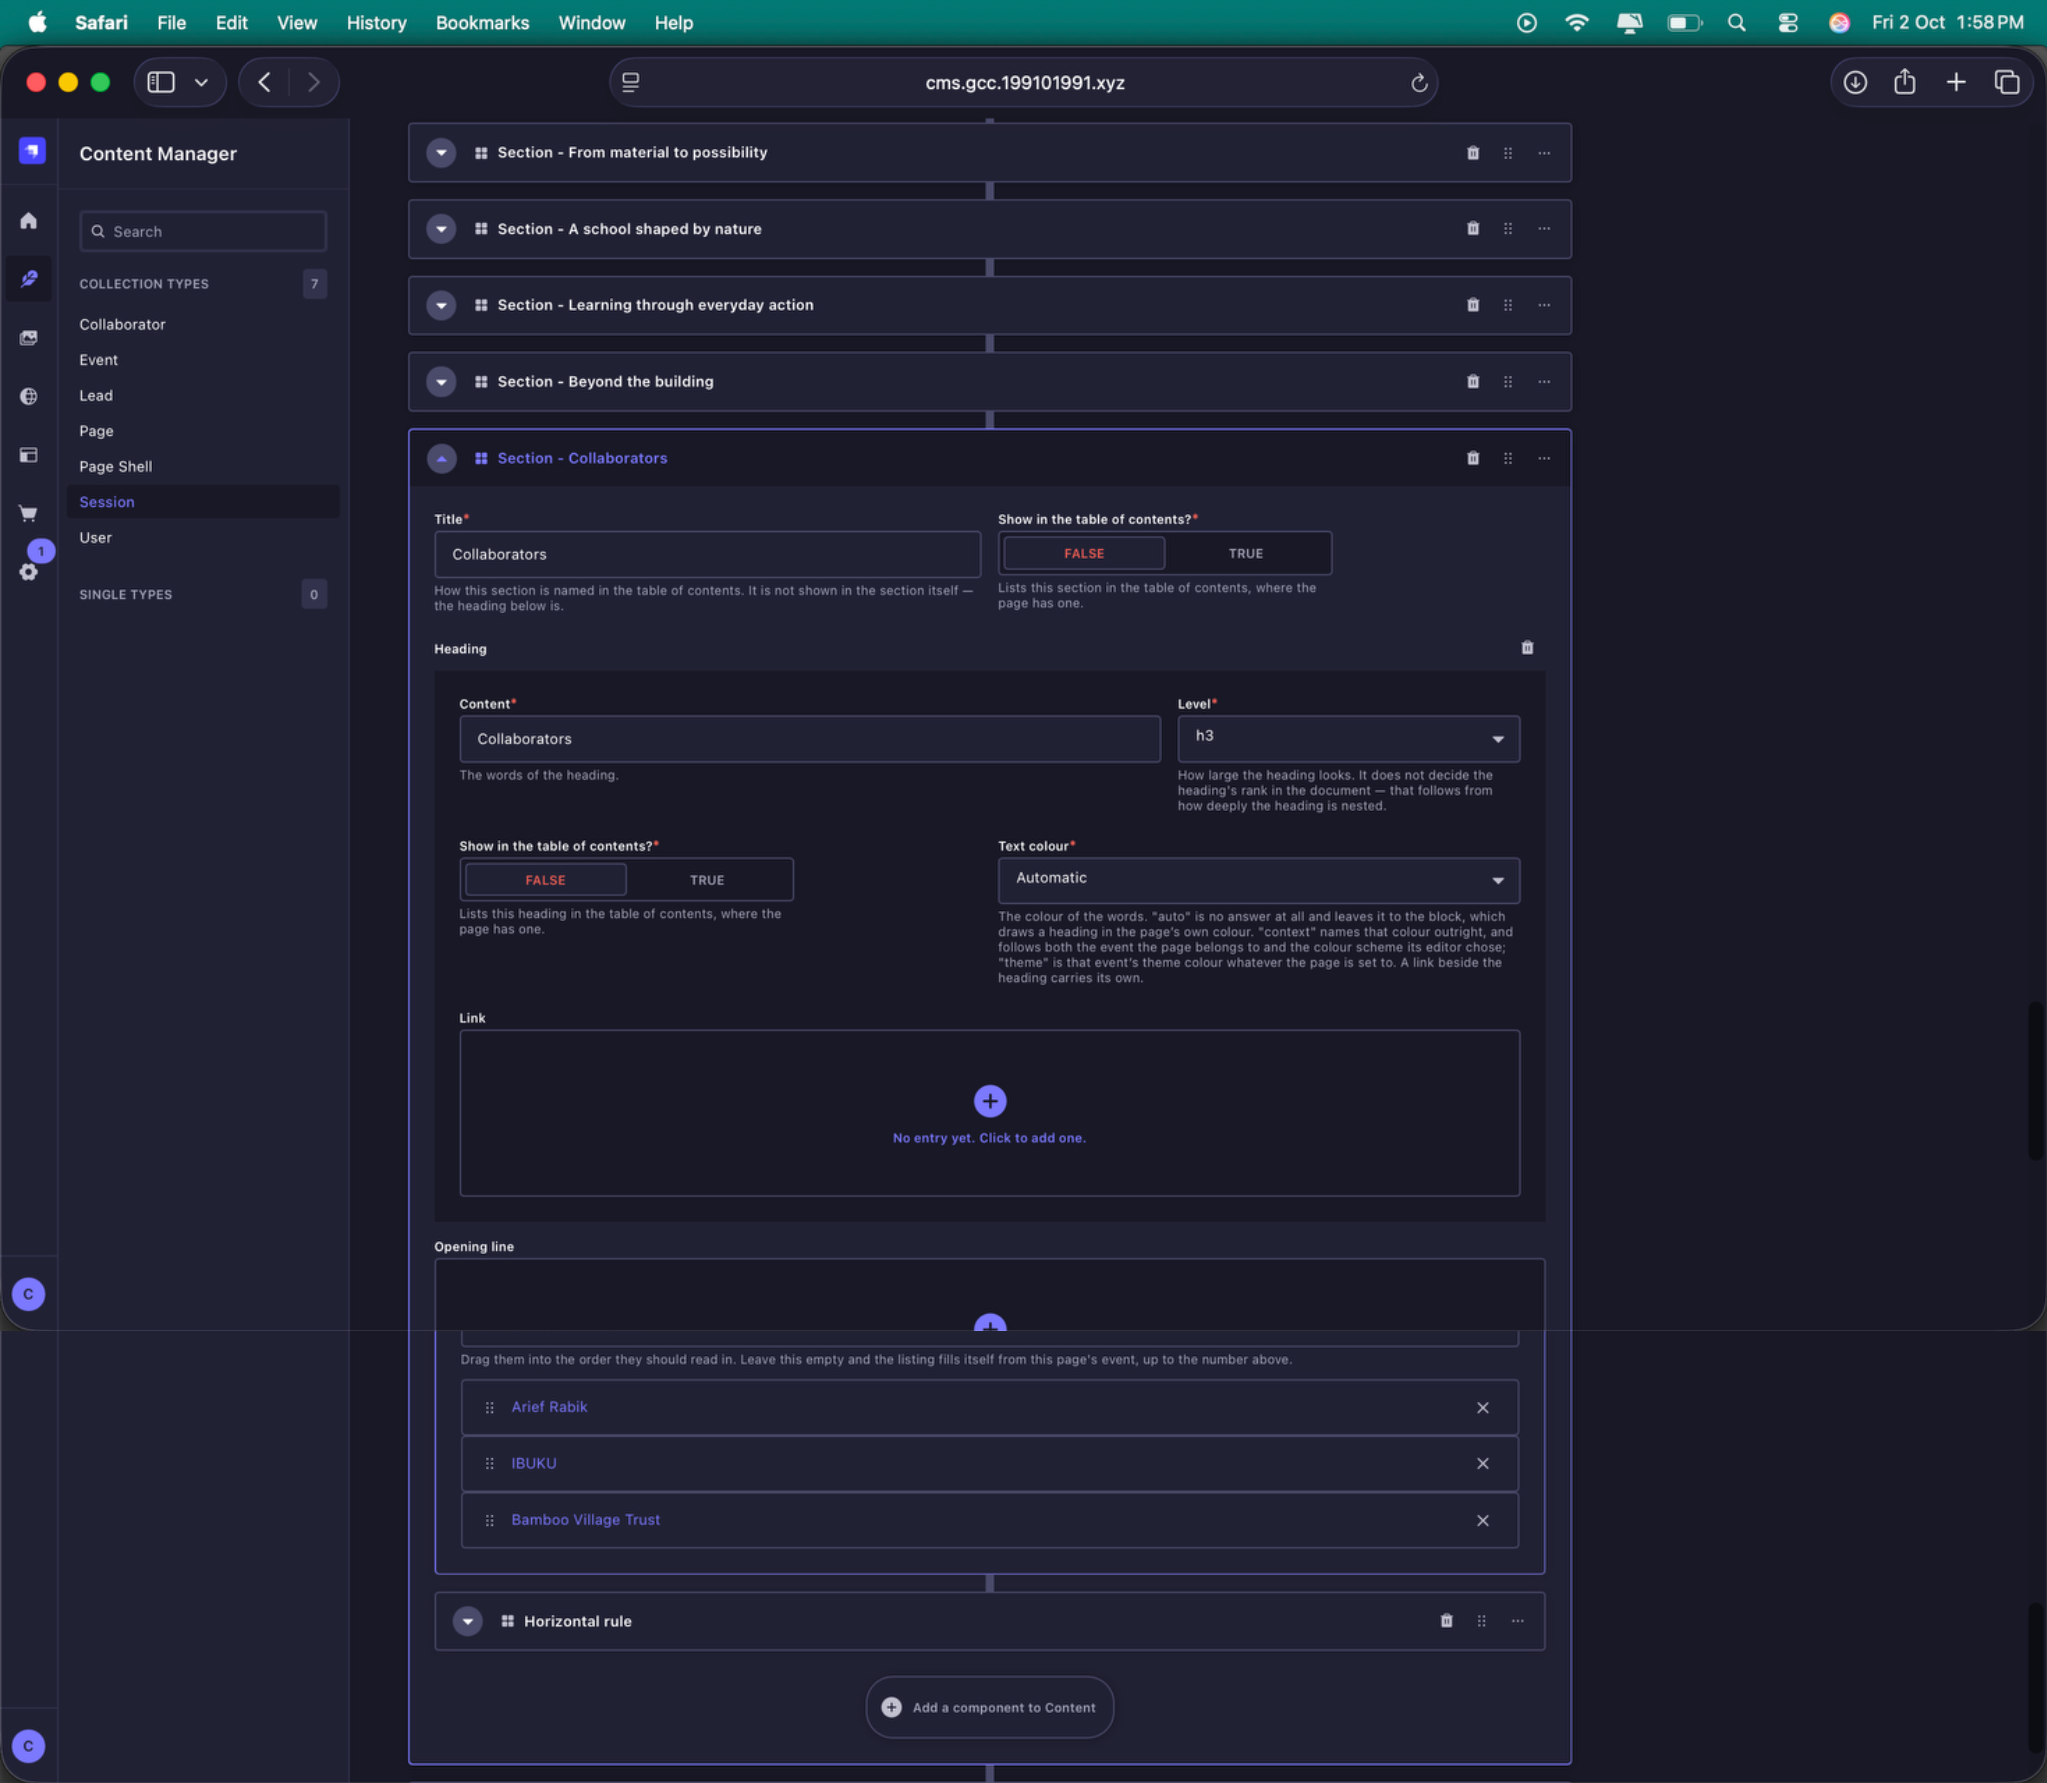
Collaborators section. The Collaborator Listing controls how the Session collaborators are presented on the page and allows their display order to be set.
10.7 Location Section
The Location section is used for the venue map and supporting location information.
- Place URL - paste the full Google Maps URL from the browser address bar.
- Zoom - controls how closely the map is framed around the location.
- WYSIWYG content - add the venue name, address and any arrival information or practical notes.
- View on Maps - add the visitor-facing Maps link as a button.
Use the full Google Maps URL from the browser address bar for the map. Do not use the short maps.app.goo.gl Share link in the Place URL field, as the server cannot resolve that shortened link.
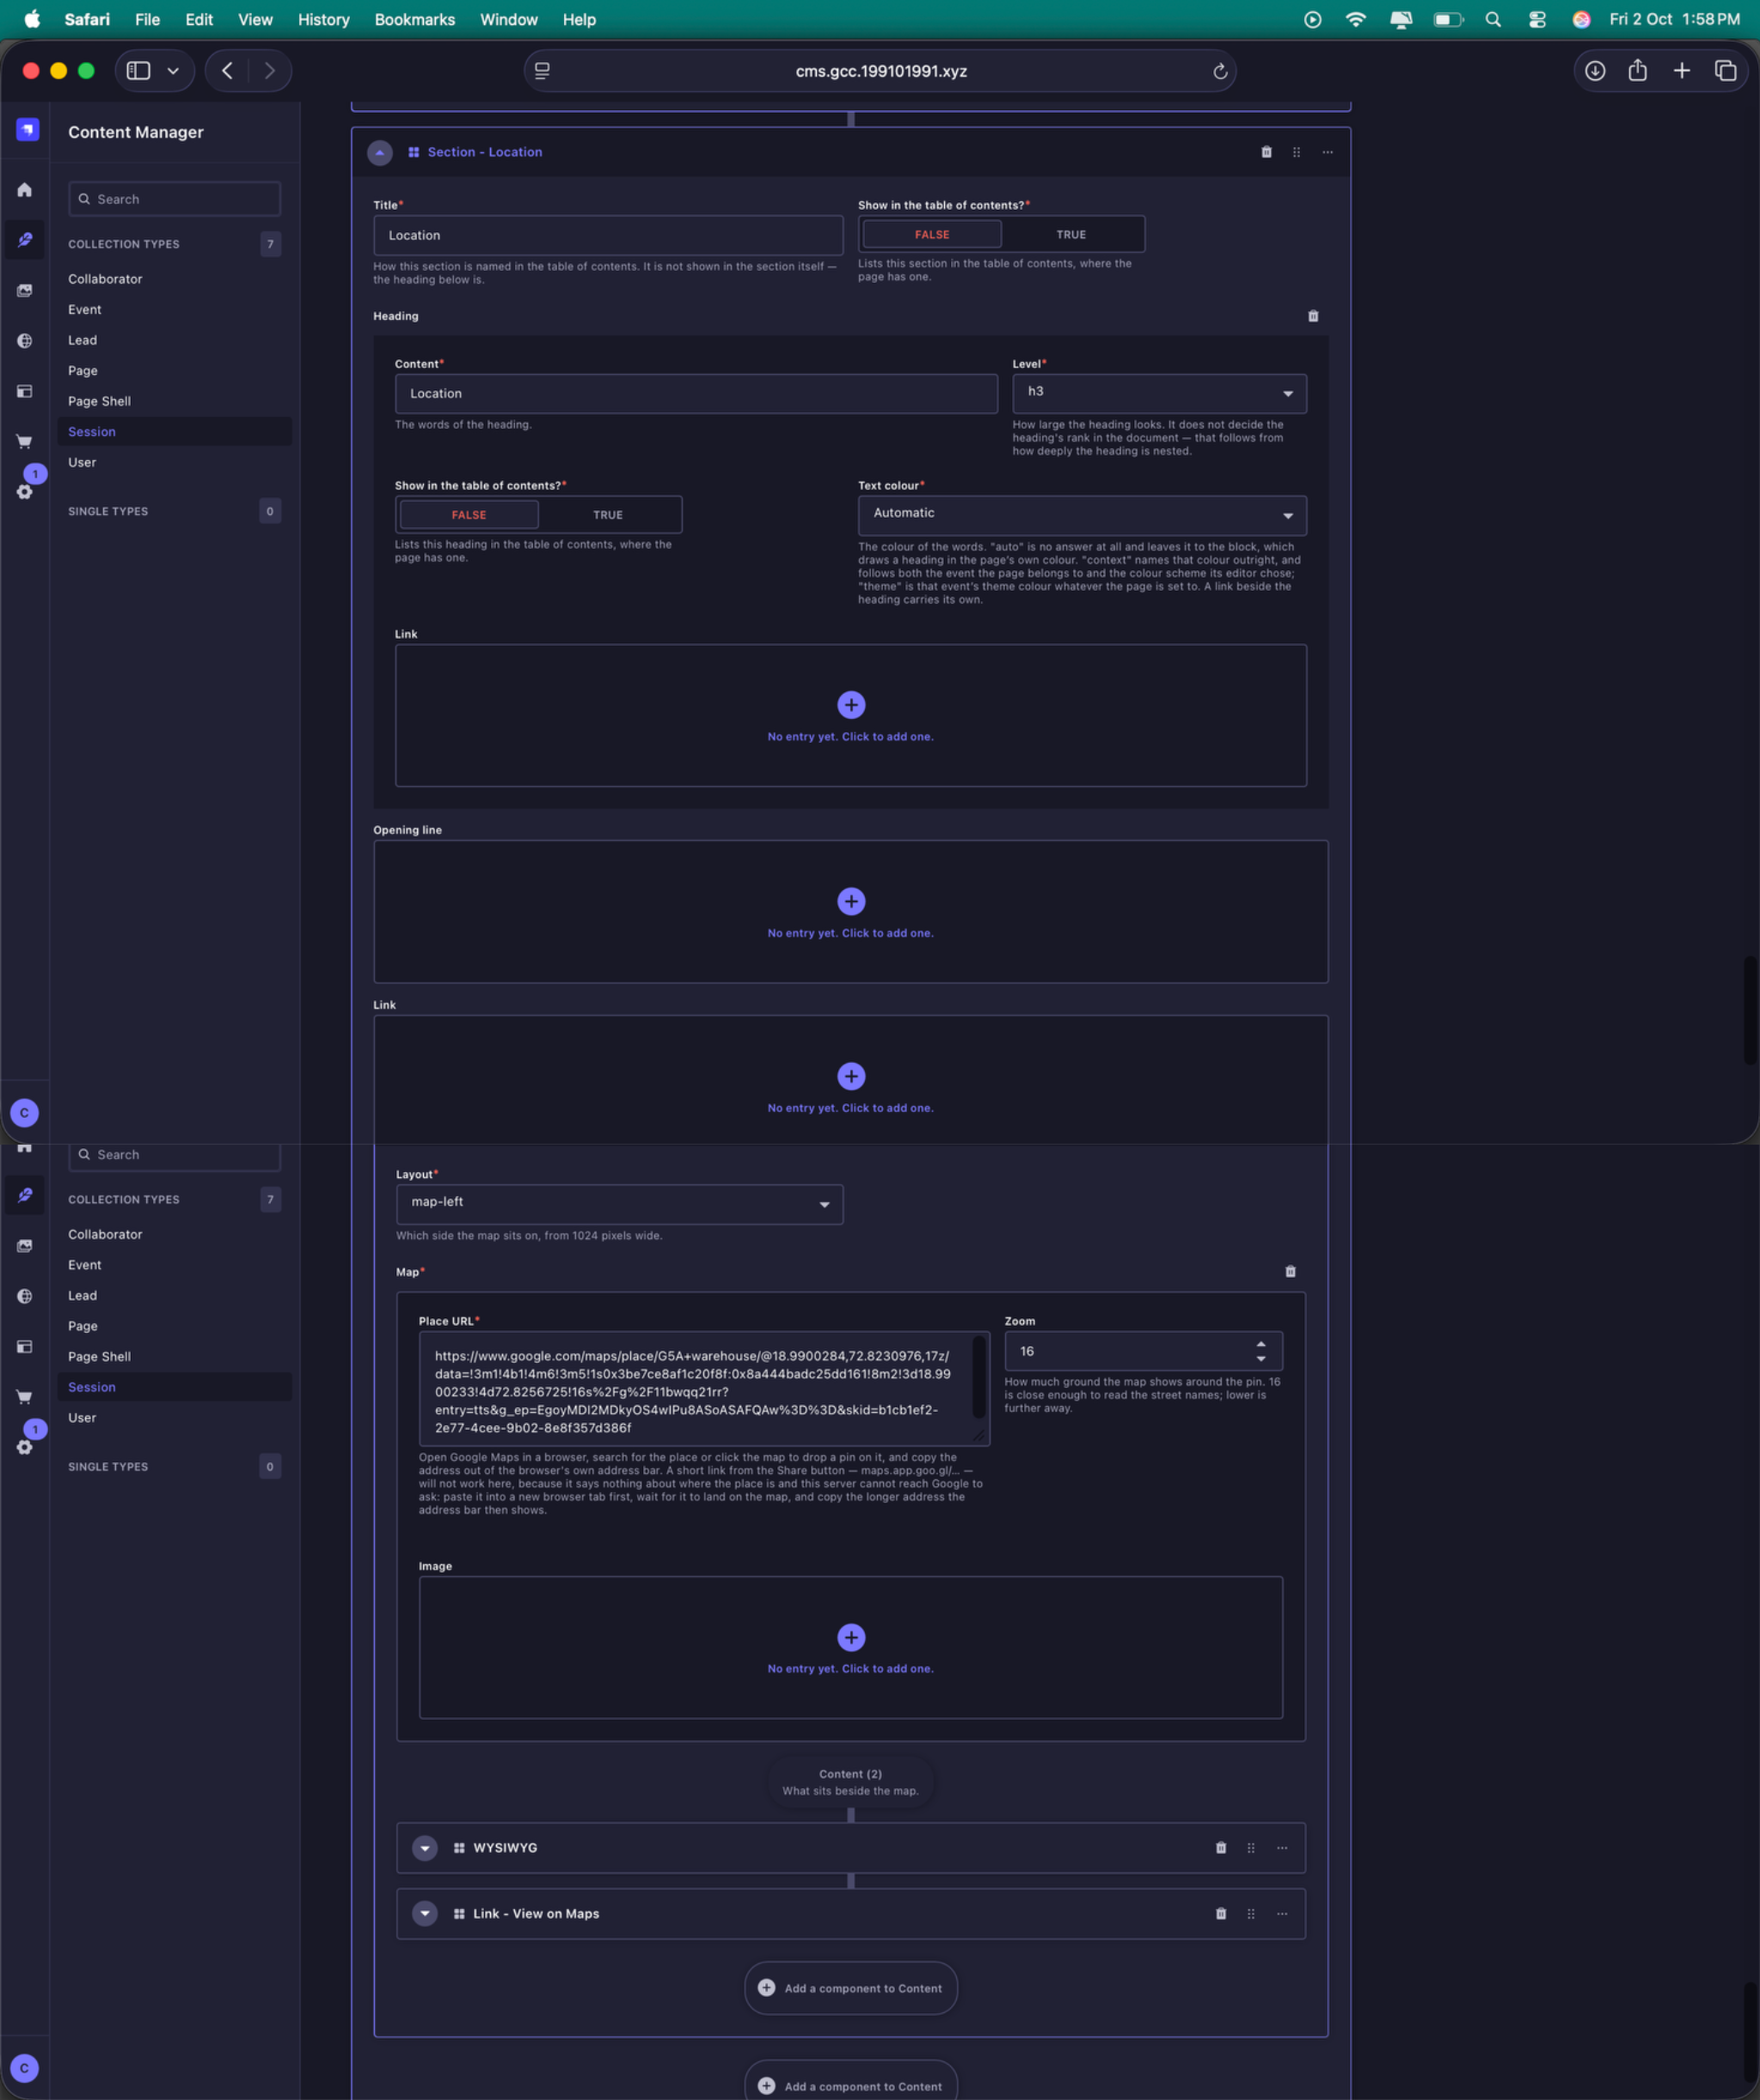
Location map setup. The Map and Content block contains the Google Maps Place URL, map zoom and supporting location content.
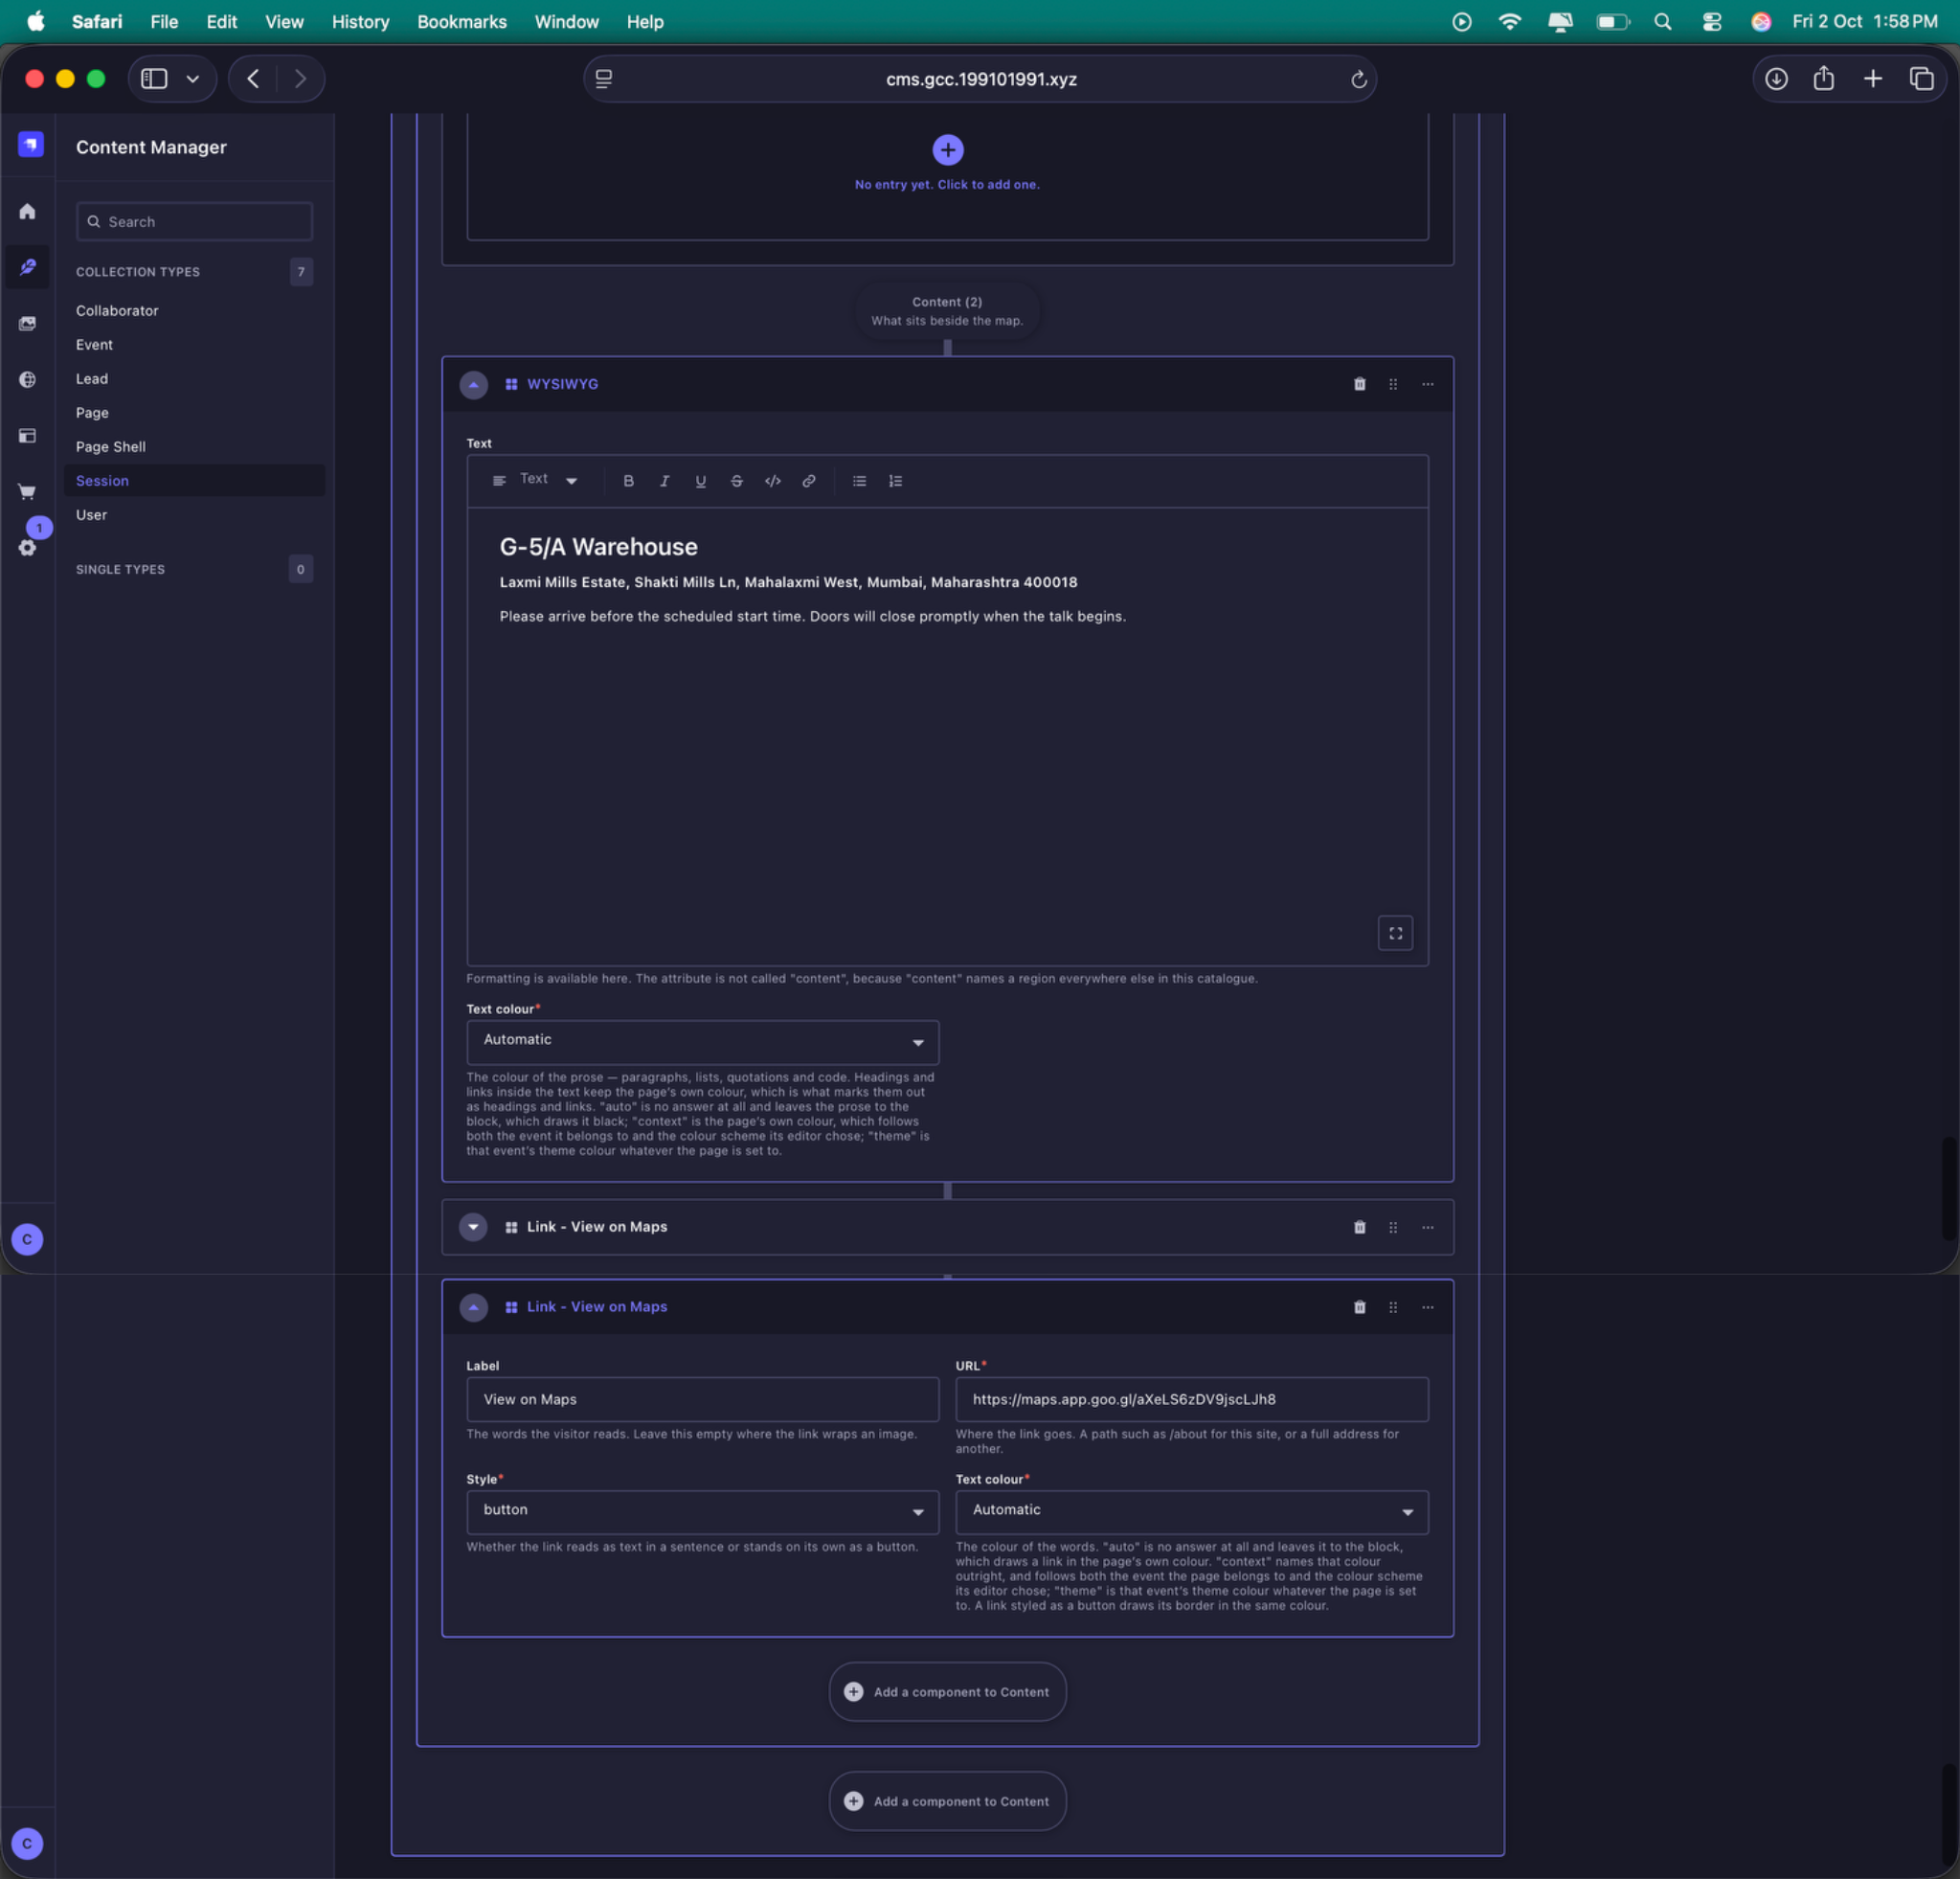
Location content and Maps link. Use the WYSIWYG field for the venue details and practical notes, then add the visitor-facing View on Maps button below it.
10.8 Before Publishing
Before publishing a Session, confirm that the following information is complete:
- the correct category has been selected,
- the Session is connected to the correct annual Event,
- all Session instances have the correct dates and times,
- Age Group, price, booking and venue information are accurate,
- the correct collaborators have been attached,
- the main image and editorial content are complete, and
- the Location information and map link have been checked.
Use Save → Open preview → Publish as described in 01. Content Authoring Guidelines.